50# Crossbow Dress-up
Polished walnut and brass.
This is the 50# aluminum pistol we have to work with. Note the grips are attached with screws.
Avoid the nylon versions that claim to have stainless steel cores.
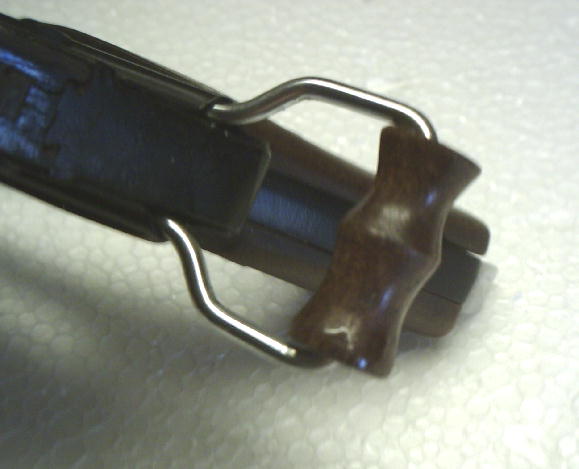
This is the easiest and perhaps the post practical modification. It is walnut, but any wood should do. A hole was drilled for a snug fit for a 3/16 bolt. I chucked it in a small lathe, but an electric drill will work. Once it is the desired shape. it was split by tapping a sharp knife blade at one end. Hold it together, and sand to the proper length. Gorilla glue or some other polyurethane glue hold it onto the cocking handle. Spar varnish finished it.
This is also a very practical accessory. Besides affording a comfortable hold, it prevents having your fingers slapped by the bowstring.
In addition, it is a place to hold onto with the left hand, while cocking with the right hand, instead of (for me anyway) having to switch hands. This increases the cyclic rate.
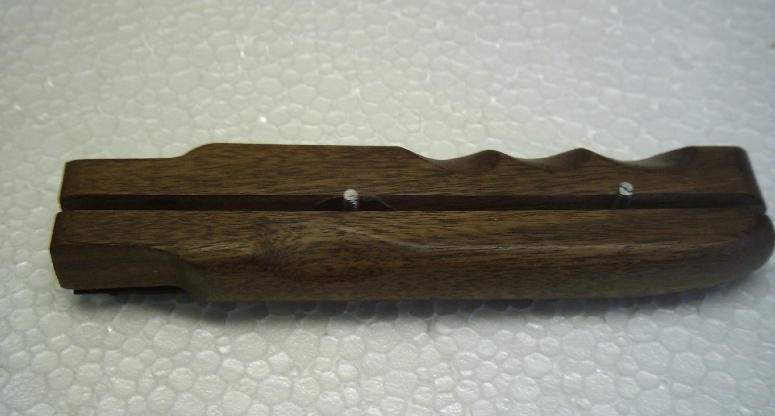
top view
Most of this is a matter of preference. The blank measured 6 1/4" x 1 1/2" x 7/8" walnut. Again, use whatever wood you prefer (or have). The saw kerf is .1 inch wide, which is perfect to mate with the underside of the pistol frame. I offset mine slightly to be wider on the right side. The kerf cut is just deep enough to accommodate the bottom of the aluminum frame.
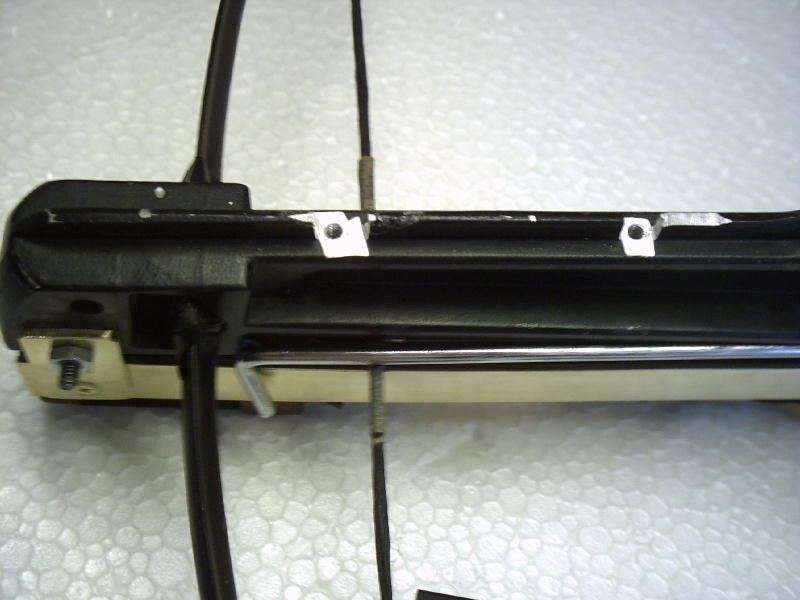
bottom view
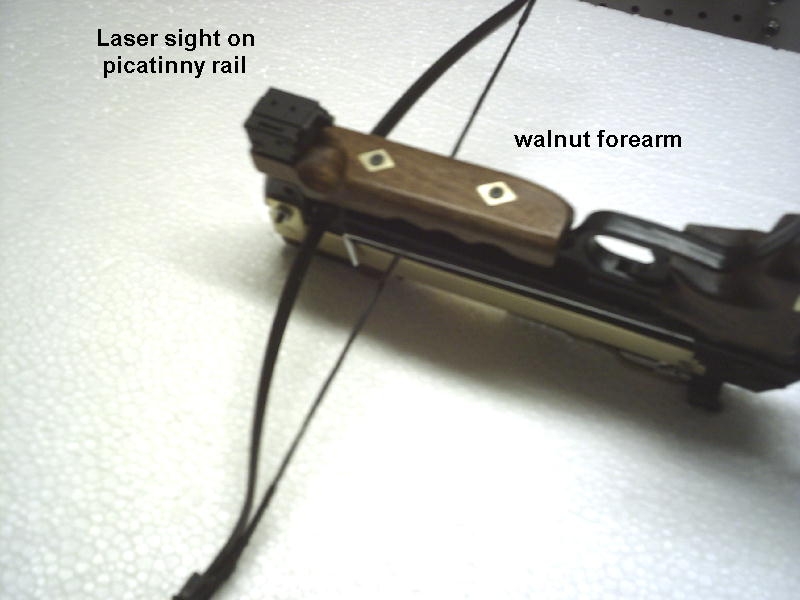
OPTIONAL. A flat was cut for the picatinny rail. Note that it must slope such that the laser sight is inline with the arrow groove on the other side. See picatinny rail specs here. NOTE: The laser sight you choose may affect the dimensions of the rail.
I recommend finishing the piece before drilling the mounting holes. Also a piece of masking tape will help keep the wood on the other side from splitting. The hole spacing is not critical, but make sure it does not interfere with anything else. When the holes are drilled, place the forearm on the frame and insert two nails. MAKING SURE it does not slip, tap the nails with a hammer to locate where to drill.
File notches as shown, replace the forearm, and nails. Mark again. In my case, I drilled and tapped for 6-32 machine screws.
Countersink or whatever is necessary on the head side for the screws. I made brass inlays. Since I have been making them for over 50 years, it comes almost automatically for me, but may be beyond the capability of a beginner.
Once everything has been fitted with ONE screw, install the laser. If it seems to be at the correct angle, remove, put a drop of Gorilla glue under it, align the laser with the existing sights built into the upper side of the pistol, and allow the glue to set. Then add the second screw.
Top view of repeater.
If you purchased plans, a notch can be cut into the front magazine guide for a second picatinny rail. Not that it in recessed so that the laser can be tipped off to use the "notch and blade" sights.
Walnut grips are very optional, so I won't get into details here. The laser can be switched on or off with a flick of the index finger.